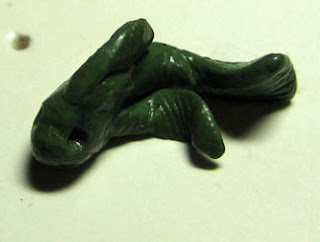
 Sorry about the glare. Sorry about the faux-wood paneling. But yes, well-spotted -- it's not a lizard. It's my sub-crocodile excitement of the moment, my old Menoth army. I'm going to make a paladin-themed army; I'm just short a unit of Bastions. I've got all these old Menites sitting around, I may as well get zealous about 'em. Ha! Ha! Menoth humor! In Protectorate, Menoth humors you! No, the other one -- Menoth burns you at the stake! Ha! Ha!
Friday, October 29, 2010
Not a lizard
Sorry about the glare. Sorry about the faux-wood paneling. But yes, well-spotted -- it's not a lizard. It's my sub-crocodile excitement of the moment, my old Menoth army. I'm going to make a paladin-themed army; I'm just short a unit of Bastions. I've got all these old Menites sitting around, I may as well get zealous about 'em. Ha! Ha! Menoth humor! In Protectorate, Menoth humors you! No, the other one -- Menoth burns you at the stake! Ha! Ha!

Bog Trogs in 15 seconds
So, there's a story behind the Bog Trogs. There's a story behind everything, I know, but this one needs a little setting up. Remember that post, where I went on and on about color schemes? And remember that wonderful, pasty Bog Trog mockup? Yeah, not happening.
"But why," you gasp.
Two reasons. The first, and short one: Because it's haaaaard. Bog Trogs are my largest unit, by far; while they're the smallest percentage of my army, points wise, they're also going to be the largest percentage of my army, models wise. I hate painting the same guy over and over again. Hate. Solution: simplify the color scheme. Less time hating.
No. 2: Anthony showed me these wonderful videos on how to do a beautiful painting technique called "Zenithal Highlighting." It involved painting a model with either an airbrush (preferred) or with two primer coats -- a heavy black one, then an intentionally uneven white one. The idea was to use a spray can to apply the second, white coat, spraying down onto the model so you got a mostly white miniature that would have darker areas where you'd naturally have shadows. Then you'd paint the miniature with super-thin paints and essentially dye the white primer; where it was heavier, the paint would naturally be lighter (because less of the black primer shows through). We tried this on the Bog Trogs, and it was a 98 percent disaster. You see, there's a special chemical composition to washes -- real washes, not watered-down acrylics -- that causes the dye to bunch up. I was just using watered-down acrylics, which meant my inking didn't move or react like a wash. Every one of my Bog Trogs ended up a horrible, uniform muddy green color; I threw a tantrum then started over on them.
Examples:
"But why," you gasp.
Two reasons. The first, and short one: Because it's haaaaard. Bog Trogs are my largest unit, by far; while they're the smallest percentage of my army, points wise, they're also going to be the largest percentage of my army, models wise. I hate painting the same guy over and over again. Hate. Solution: simplify the color scheme. Less time hating.
No. 2: Anthony showed me these wonderful videos on how to do a beautiful painting technique called "Zenithal Highlighting." It involved painting a model with either an airbrush (preferred) or with two primer coats -- a heavy black one, then an intentionally uneven white one. The idea was to use a spray can to apply the second, white coat, spraying down onto the model so you got a mostly white miniature that would have darker areas where you'd naturally have shadows. Then you'd paint the miniature with super-thin paints and essentially dye the white primer; where it was heavier, the paint would naturally be lighter (because less of the black primer shows through). We tried this on the Bog Trogs, and it was a 98 percent disaster. You see, there's a special chemical composition to washes -- real washes, not watered-down acrylics -- that causes the dye to bunch up. I was just using watered-down acrylics, which meant my inking didn't move or react like a wash. Every one of my Bog Trogs ended up a horrible, uniform muddy green color; I threw a tantrum then started over on them.
Examples:

Here was the first wash. So far, so good -- darker eyes, darker toes, darker space between the knuckles.
I know you won't believe this, but this was a thin, thin, thin wash. It was Citadel's "Dark Angels Green" lightened up a shade with Citadel's "Snot Green" and mixed 1:3 with water -- that's right, this was only 25 percent paint. Note how it didn't pool. Note how it didn't run into the crevices. Note how it did just mightily muddify the miniature.
Oh, it burns us! Just look at it! I tried this on three Bog Trogs before screaming about the Illuminati, stomping about the house like a child and generally acting like a spoiled, paranoid brat. I just did a standard paint job on the guys, working up from this horrible snot of a base color.
Here's the final product for one. Note the brass -- it's a minor detail on the model, but I wanted to go with something primitive (compared to steel, at least). Considering that iron rusts and these guys live, you know, in the swamp, I thought it was a nice touch. It's also better with the color scheme of green with red touches.
The backside of trog No. 1. I have a confession -- all the trogs have these little things hanging down from their belts, and I have no clue what they're supposed to be. This one has what looks like a quiver, but the Bog Trogs don't actually shoot or throw anything. Other ones have less identifiable junk; I played a game of "what's that object" and just ended up assuming the Trogs were carting around octopuses. It's what I'd cart if I was a Trog.
This is Bog Trog No. 2. I made a deal with myself -- every two trogs I paint, I get to paint something that's not a trog. That's why there's only two done -- to save my sanity.
Swamp template No. 1, part 4
So, I may have skipped about 2 steps in my swamp template process. I'm sorry. I'm using Anthony's digital camera, and he needed it. That and I was impatient -- I'd just found this product, Envirotex Lite, that makes wonderful water, and I had to use it!

Sooo it looks OK! I'm not happy with the grass; in the future, I'm going to have much more of it, at several different heights, and in much larger patches. I'm also going to plan ahead on lilly pads -- they need to be added to the Envirotex before it dries too much, and they need to have a dangling stem so they seem like they're part of the water, not simply floating 100% on top. (Real lillies -- one of my favorite plants -- are often partially submerged, and they have rippled edges. Mine fail to have either of those qualities.)

Here's an overhead shot, where you can see the fish in the lower left corner, as well as the crawdad across from him. I'm going to add a thin bead of Woodland Scenics "Water Effects" on either side of the fish's fin so there'll be a subtle ripple effect.
Wait, what was that? Where's the crawdad?
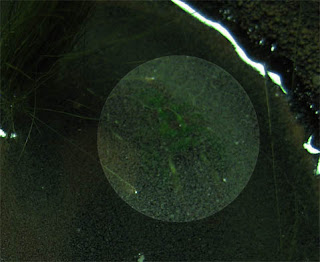
The lesson here: Envirotex has a native amber color to it (it's slight, but clearly visible in the first picture), and it drowns out weak colors, like forest green and velvet red (or, eh, Citadel's "Dark Angels Green" and "Scab Red," I guess). The fact that I dyed the Envirotex with a mix of brown, black and green didn't help one bit. In the future, I'll brighten up such cute little additions so they're visible.

Sooo it looks OK! I'm not happy with the grass; in the future, I'm going to have much more of it, at several different heights, and in much larger patches. I'm also going to plan ahead on lilly pads -- they need to be added to the Envirotex before it dries too much, and they need to have a dangling stem so they seem like they're part of the water, not simply floating 100% on top. (Real lillies -- one of my favorite plants -- are often partially submerged, and they have rippled edges. Mine fail to have either of those qualities.)

Here's an overhead shot, where you can see the fish in the lower left corner, as well as the crawdad across from him. I'm going to add a thin bead of Woodland Scenics "Water Effects" on either side of the fish's fin so there'll be a subtle ripple effect.
Wait, what was that? Where's the crawdad?

The lesson here: Envirotex has a native amber color to it (it's slight, but clearly visible in the first picture), and it drowns out weak colors, like forest green and velvet red (or, eh, Citadel's "Dark Angels Green" and "Scab Red," I guess). The fact that I dyed the Envirotex with a mix of brown, black and green didn't help one bit. In the future, I'll brighten up such cute little additions so they're visible.
Swamp template No. 1, part 3
Swamps are teeming with life. There are, by my count, at least five things in them -- crocodiles, fish / fish-men, grass, cattywampus, crawdads and squid-man things. Six things. At least six things. So my swamps will also teem with life. To start out though, I had to model the smallest thing I could -- starting with a fish and a crawdad.

 Oh they're terrible! I know! I have a defense, though -- they're tiny, tiny, tinytinytiny. Seriously, even by my standards -- these things are actually proper scale for a lobster (I know, larger than a crawdad) and a medium-sized catfish. Both of these are smaller than a quarter-inch long.
Part two, out the window with scale:

 That's so much better! The fish photo isn't super-flattering, but it gets the job done. These are between 1/2 and 3/4 of an inch long -- in other words, they're between 3 and 4.5 feet in scale. That's buyable for a catfish, but we'll just have to say the crawdad is a mutant fantasy crawdad. I managed to not get my grubby fingerprints all over the crustacean -- thank you, wax paper, much appreciated -- but I stupidly touched the fish. That got sanded down the next day.
 I didn't get any good photos of painted critters. Sorry! You'll have to make due with seeing the pair in their new home, a temporary swamp template. I'm seriously tempted to sculpt a few floppy fish and an upset crawdad for my warbeasts' bases, since these critters are gonna have to end up somewhere.

 Oh they're terrible! I know! I have a defense, though -- they're tiny, tiny, tinytinytiny. Seriously, even by my standards -- these things are actually proper scale for a lobster (I know, larger than a crawdad) and a medium-sized catfish. Both of these are smaller than a quarter-inch long.
Part two, out the window with scale:

 That's so much better! The fish photo isn't super-flattering, but it gets the job done. These are between 1/2 and 3/4 of an inch long -- in other words, they're between 3 and 4.5 feet in scale. That's buyable for a catfish, but we'll just have to say the crawdad is a mutant fantasy crawdad. I managed to not get my grubby fingerprints all over the crustacean -- thank you, wax paper, much appreciated -- but I stupidly touched the fish. That got sanded down the next day.
 I didn't get any good photos of painted critters. Sorry! You'll have to make due with seeing the pair in their new home, a temporary swamp template. I'm seriously tempted to sculpt a few floppy fish and an upset crawdad for my warbeasts' bases, since these critters are gonna have to end up somewhere.
Swamp Template No. 1, part 2
After another pass of ballast and a nice, solid coat of black primer (the most wonderful, sandable primer -- it's Dupli-Color brand, courtesy of our roommate Anthony), we have a workable swamp template.
 So, first things first -- we've got to get some brown on that soil. I have some old Reaper paints I'm trying to work through (the dropper bottles are horrible, they clog up like no one's business), so we're going to put down a generous layer of dark brown. (I don't have the actual name -- the label came off some time ago. They're old paints!) On top of that goes a mix of the dark brown and Reaper's "Leather Brown," then "Leather Brown" by itself, then a mix of Citadel's "Graveyard Earth" and "Leather Brown." Then I picked out the rocks with Graveyard Earth.
 The center swirl is mostly Citadel's "Bleached Bone"; there's Reaper "Antique Gold" in there, too, mostly for some shiny flecks. The green cutting mat washed out the color, but if you look carefully, you'll see some Citadel "Flesh Wash" streaked in there, too. (The "Flesh Wash" also went over parts of the soil, and some of the soil got a second build-up from black, either because the ballast flaked off -- so frustrating -- or because I wanted a darker patch.)
 Here's the final product, ready for additions!
 You can see all the different browns here. The one on the far right is a wash. They're not in a nice order, but you can see the gradation from darkest -- at the 10 o'clock position -- to the lightest, at the 9 o'clock position.
 So, first things first -- we've got to get some brown on that soil. I have some old Reaper paints I'm trying to work through (the dropper bottles are horrible, they clog up like no one's business), so we're going to put down a generous layer of dark brown. (I don't have the actual name -- the label came off some time ago. They're old paints!) On top of that goes a mix of the dark brown and Reaper's "Leather Brown," then "Leather Brown" by itself, then a mix of Citadel's "Graveyard Earth" and "Leather Brown." Then I picked out the rocks with Graveyard Earth.
 The center swirl is mostly Citadel's "Bleached Bone"; there's Reaper "Antique Gold" in there, too, mostly for some shiny flecks. The green cutting mat washed out the color, but if you look carefully, you'll see some Citadel "Flesh Wash" streaked in there, too. (The "Flesh Wash" also went over parts of the soil, and some of the soil got a second build-up from black, either because the ballast flaked off -- so frustrating -- or because I wanted a darker patch.)
 Here's the final product, ready for additions!
 You can see all the different browns here. The one on the far right is a wash. They're not in a nice order, but you can see the gradation from darkest -- at the 10 o'clock position -- to the lightest, at the 9 o'clock position.
Thursday, October 21, 2010
Swamp Template No. 1, part 1
Bloody Barnabas makes 5-inch swamps. That means I need to make 5-inch swamp templates. I briefly considered cutting crude circles with the word "SWMAP" written on it with crayon -- just like what a crocodile would do -- but thought better of it.
The problem, from my point of view, is that so many terrain features aren't designed for models to tromp around on. I wanted something pretty, eye-catching and special, but I also wanted something that models could walk on.
Template No. 1 is my first try. I've got a few other ideas about what to do, but this one is based on the idea of a gentle slope (which models can be balanced on easily) and a central gap filled with solid, clear substance.
I started by cutting a 5-inch posterboard circle using a sharp knife and a compass. I then cut slightly smaller rings from foam core.

I then glued the rings to the posterboard.

Then I used green stuff putty to create a nice slope on the bottom portion; the top turned out to be too steep, so I just cut away from the foam core.

After a little bit more putty work, I was happy with my slope. I watered down some PVA glue, painted the whole thing with the adhesive, then added ballast to the template.

There's one of the bog trogs for comparison. There'll be another pass of ballast, then primer.
The problem, from my point of view, is that so many terrain features aren't designed for models to tromp around on. I wanted something pretty, eye-catching and special, but I also wanted something that models could walk on.
Template No. 1 is my first try. I've got a few other ideas about what to do, but this one is based on the idea of a gentle slope (which models can be balanced on easily) and a central gap filled with solid, clear substance.
I started by cutting a 5-inch posterboard circle using a sharp knife and a compass. I then cut slightly smaller rings from foam core.

I then glued the rings to the posterboard.

Then I used green stuff putty to create a nice slope on the bottom portion; the top turned out to be too steep, so I just cut away from the foam core.

After a little bit more putty work, I was happy with my slope. I watered down some PVA glue, painted the whole thing with the adhesive, then added ballast to the template.

There's one of the bog trogs for comparison. There'll be another pass of ballast, then primer.
Pretty Water
Crocodiles and catfish live in water. It's a commonly known scientific fact. What that means for me is simple -- I've got to be able to replicate water. There's going to be water on everyone's bases, but there's also going to be water in my upcoming swamp templates.
The problem is that convincing water is difficult to make. I've used PVA glue in the past -- probably better known to readers as Elmer's Glue -- but it's terrible for that purpose.
You see, PVA glue dries via evaporation. Whatever chemical component keeps the substance fluid escapes, leaving behind a dry, solid mass. This is perhaps one of the worst things ever for creating flat, predictable shapes.
1. You'll get a bowed shape. The topmost layer and the edges of the glue will dry first. As your glue loses volume, it settles; the skin in the center has less rigidity than the edges, meaning that your glue pool will settle into a bowl. It's very un-water-like.
2. You'll see gaps form around the edges. You can see this below in my Stalker:

See that black line between the plastic base and the gray, dried glue? That's a gap. You can actually feel the glue shifting if you touch it -- it's only anchored in some places. Eventually, this glue will come right off. This phenomenon is related to the bowing above; as the center mass dries and loses volume, it pulls the dried sections in.
3. Bubbles and craters form. This is especially catastrophic, and can be seen clearly in the test I ran on a mass of PVA glue:


(The black and brown gunk is ballast. I use a mix of wood flakes, sand and rocks; some of it floats. I tried to make this test realistic by basing the bottom of this vacuum-sealed plastic shape before putting the PVA glue down.)
I don't really know why these happen, but I assume they're related to gas being trapped beneath dried glue. My guess is that pockets of gas meet up and escape catastrophically when the glue's shrinking volume stretches a dried section enough to allow the gas to escape.
4. The glue dries in sections. This is the PVA glue, over a week after I'd laid it down:

That white line at the bottom, just above the gravel, is wet glue! Eight days later! The dried glue above created a sealed chamber that kept the other glue wet.
I tried this same experiment with clear Tacky Glue and had the similar results. The Tacky Glue has two significant advantages, though, and I'll use it on the bases -- the shrinkage is far smaller, and the color control, when dye is added to it, is much better.
For the swamp templates -- I'll have to use the far more expensive Realistic Water or Water Effects products (from Woodland Scenics and Games Workshop, respectively). However, even those products have problems with shrinking volume, and the Realistic Water looks like it'll be a nightmare to color-fix. We'll see!
The problem is that convincing water is difficult to make. I've used PVA glue in the past -- probably better known to readers as Elmer's Glue -- but it's terrible for that purpose.
You see, PVA glue dries via evaporation. Whatever chemical component keeps the substance fluid escapes, leaving behind a dry, solid mass. This is perhaps one of the worst things ever for creating flat, predictable shapes.
1. You'll get a bowed shape. The topmost layer and the edges of the glue will dry first. As your glue loses volume, it settles; the skin in the center has less rigidity than the edges, meaning that your glue pool will settle into a bowl. It's very un-water-like.
2. You'll see gaps form around the edges. You can see this below in my Stalker:

See that black line between the plastic base and the gray, dried glue? That's a gap. You can actually feel the glue shifting if you touch it -- it's only anchored in some places. Eventually, this glue will come right off. This phenomenon is related to the bowing above; as the center mass dries and loses volume, it pulls the dried sections in.
3. Bubbles and craters form. This is especially catastrophic, and can be seen clearly in the test I ran on a mass of PVA glue:


(The black and brown gunk is ballast. I use a mix of wood flakes, sand and rocks; some of it floats. I tried to make this test realistic by basing the bottom of this vacuum-sealed plastic shape before putting the PVA glue down.)
I don't really know why these happen, but I assume they're related to gas being trapped beneath dried glue. My guess is that pockets of gas meet up and escape catastrophically when the glue's shrinking volume stretches a dried section enough to allow the gas to escape.
4. The glue dries in sections. This is the PVA glue, over a week after I'd laid it down:

That white line at the bottom, just above the gravel, is wet glue! Eight days later! The dried glue above created a sealed chamber that kept the other glue wet.
I tried this same experiment with clear Tacky Glue and had the similar results. The Tacky Glue has two significant advantages, though, and I'll use it on the bases -- the shrinkage is far smaller, and the color control, when dye is added to it, is much better.
For the swamp templates -- I'll have to use the far more expensive Realistic Water or Water Effects products (from Woodland Scenics and Games Workshop, respectively). However, even those products have problems with shrinking volume, and the Realistic Water looks like it'll be a nightmare to color-fix. We'll see!
Subscribe to:
Posts (Atom)
