Showing posts with label swamp template. Show all posts

Saturday, November 6, 2010

Swamp template No. 2, part 4

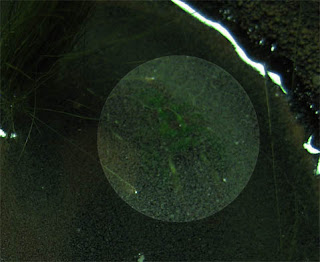
Sorry for the blurry image. Here's the first layer of water, with swamp muck.


It came out a lot darker than I wanted, and it's much more opaque than I'd hoped, but it's a great effect. I still have another layer of water to put down, and the standing tree isn't done yet. I think this one will end up looking better than the first by a wide margin at this rate.


I think this proved my point! The Envirotex Lite is still wet -- it won't be set enough for me to work it for at least another day -- but it's looking amazing. There's a real sense that the water is disgusting and unpalatable; the creature looks like it's surfacing just slightly.

It's still not as clear as I'd like. In my experimental runs, the Envirotex started cloudy and cleared as it dried, but even if it doesn't clear up at all, that's OK -- this still looks wonderful. Some water effects will add ripples to the beast, and the tall tree will get some gray and then white highlights. I really need to finish some bog trogs before I go and start my next template, but that one's going to be idyllic -- pretty rocks, nice grass, perhaps some catty wampus, and clear water with fish and crawdads (again).

Swamp template No. 2, part 3

The rotting log has been finished, sanded, painted and glued into place. It's a pretty light-duty glue -- when the Envirotex dries, it'll hold the sucker in place far better.

It's just successive layers of brown, each lighter than the last. I think I ended up using two washes and five shades of brown; after it was in place, I added to light touches of green-brown to the part that will be below the water line. Later, I'll be brightening up the top half a little more, moving it toward grey, but that's not going to be until the Envirotex is in place. When that's dry (or mostly dry, depending on if I'm willing to destroy a brush), I'll be adding more green-yellow to the side of the log at the water line, and maybe even have some float on the top of the Envirotex to simulate pond scum.


I ditched the other plants I'd sculpted; I couldn't get them to work right, but my Milliput is acting weird, too. It's crumbling and falling apart; I don't know if it's old or I didn't add enough of the yellow part to the white part. (Milliput's an epoxy -- it has two substances that, when combined, become a workable putty that dries to a sandable finish. It's good for creating detail-light structures or for making cores to build up from; that's because it's easier to work and it's water soluble. However, it cracks very easily and doesn't hold fine shapes like green stuff.) In either case, the plants are next to unworkable and I'm having the damndest time getting branches on them. I'll try again with new sculpts on swamp template No. 3; this tree turned out not bad, so I feel l ought to keep trying to sculpt.


To add a little more to the final swamp, I ended up grabbing an old pewter tree I've had lying around for at least six years -- before I moved down to Orange County -- and I twisted it and bent the branches so it looks forlorn and droopy. It's going to hang over the other elements, but it's thin so it should come out looking OK.

Wednesday, November 3, 2010

Swamp template No. 2, part 2

The floating log is coming along. The other half is still bare Miliput, and this half needs more roots and more sanding, but what doesn't, yaknowhatimean?


And swamp creature is added to the template. It'll look better with some water, I promise. I hope. I think.


Friday, October 29, 2010

Swamp Template No. 2, part 1

The first template taught me a few things. This one's gonna be pretty drastically different -- I want to learn other things.

You can see that this one has a different feel already -- that swirling green mass reflects that this swamp is going to be non-idyllic. The idea on this one is to have dead and rotting matter, like logs and twisted vines, and something big and unidentifiable will be slithering about in the depths. The water's coming in two layers on this one -- first will be a green-yellow layer that's got flock floating in it; the second will be a lighter layer that's relatively clear of debris.

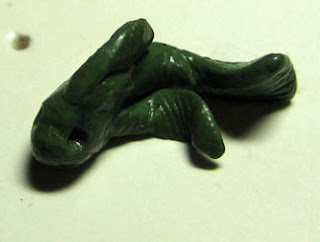
Here's the stuff in progress -- what's going to be a floating log, a wilted and disgusting plant, and the something that'll be swimming in the muck. If you can't tell, it's a scaled beast of some kind; its back is just breaking the water. (Think of those old pictures and drawings of Nessie -- how it's supposed to break the surface like a snake undulating up and down, rather than left to right.)

These will be trees; they'll get green stuff bark and thinner, crooked green stuff branches.

Swamp template No. 1, part 4

So, I may have skipped about 2 steps in my swamp template process. I'm sorry. I'm using Anthony's digital camera, and he needed it. That and I was impatient -- I'd just found this product, Envirotex Lite, that makes wonderful water, and I had to use it!


Sooo it looks OK! I'm not happy with the grass; in the future, I'm going to have much more of it, at several different heights, and in much larger patches. I'm also going to plan ahead on lilly pads -- they need to be added to the Envirotex before it dries too much, and they need to have a dangling stem so they seem like they're part of the water, not simply floating 100% on top. (Real lillies -- one of my favorite plants -- are often partially submerged, and they have rippled edges. Mine fail to have either of those qualities.)


Here's an overhead shot, where you can see the fish in the lower left corner, as well as the crawdad across from him. I'm going to add a thin bead of Woodland Scenics "Water Effects" on either side of the fish's fin so there'll be a subtle ripple effect.

Wait, what was that? Where's the crawdad?


The lesson here: Envirotex has a native amber color to it (it's slight, but clearly visible in the first picture), and it drowns out weak colors, like forest green and velvet red (or, eh, Citadel's "Dark Angels Green" and "Scab Red," I guess). The fact that I dyed the Envirotex with a mix of brown, black and green didn't help one bit. In the future, I'll brighten up such cute little additions so they're visible.

Swamp template No. 1, part 3

Swamps are teeming with life. There are, by my count, at least five things in them -- crocodiles, fish / fish-men, grass, cattywampus, crawdads and squid-man things. Six things. At least six things. So my swamps will also teem with life. To start out though, I had to model the smallest thing I could -- starting with a fish and a crawdad.


Oh they're terrible! I know! I have a defense, though -- they're tiny, tiny, tinytinytiny. Seriously, even by my standards -- these things are actually proper scale for a lobster (I know, larger than a crawdad) and a medium-sized catfish. Both of these are smaller than a quarter-inch long.

Part two, out the window with scale:


That's so much better! The fish photo isn't super-flattering, but it gets the job done. These are between 1/2 and 3/4 of an inch long -- in other words, they're between 3 and 4.5 feet in scale. That's buyable for a catfish, but we'll just have to say the crawdad is a mutant fantasy crawdad. I managed to not get my grubby fingerprints all over the crustacean -- thank you, wax paper, much appreciated -- but I stupidly touched the fish. That got sanded down the next day.

I didn't get any good photos of painted critters. Sorry! You'll have to make due with seeing the pair in their new home, a temporary swamp template. I'm seriously tempted to sculpt a few floppy fish and an upset crawdad for my warbeasts' bases, since these critters are gonna have to end up somewhere.

Swamp Template No. 1, part 2

After another pass of ballast and a nice, solid coat of black primer (the most wonderful, sandable primer -- it's Dupli-Color brand, courtesy of our roommate Anthony), we have a workable swamp template.
So, first things first -- we've got to get some brown on that soil. I have some old Reaper paints I'm trying to work through (the dropper bottles are horrible, they clog up like no one's business), so we're going to put down a generous layer of dark brown. (I don't have the actual name -- the label came off some time ago. They're old paints!) On top of that goes a mix of the dark brown and Reaper's "Leather Brown," then "Leather Brown" by itself, then a mix of Citadel's "Graveyard Earth" and "Leather Brown." Then I picked out the rocks with Graveyard Earth.

The center swirl is mostly Citadel's "Bleached Bone"; there's Reaper "Antique Gold" in there, too, mostly for some shiny flecks. The green cutting mat washed out the color, but if you look carefully, you'll see some Citadel "Flesh Wash" streaked in there, too. (The "Flesh Wash" also went over parts of the soil, and some of the soil got a second build-up from black, either because the ballast flaked off -- so frustrating -- or because I wanted a darker patch.)

Here's the final product, ready for additions!

You can see all the different browns here. The one on the far right is a wash. They're not in a nice order, but you can see the gradation from darkest -- at the 10 o'clock position -- to the lightest, at the 9 o'clock position.

Thursday, October 21, 2010

Swamp Template No. 1, part 1

Bloody Barnabas makes 5-inch swamps. That means I need to make 5-inch swamp templates. I briefly considered cutting crude circles with the word "SWMAP" written on it with crayon -- just like what a crocodile would do -- but thought better of it.

The problem, from my point of view, is that so many terrain features aren't designed for models to tromp around on. I wanted something pretty, eye-catching and special, but I also wanted something that models could walk on.

Template No. 1 is my first try. I've got a few other ideas about what to do, but this one is based on the idea of a gentle slope (which models can be balanced on easily) and a central gap filled with solid, clear substance.

I started by cutting a 5-inch posterboard circle using a sharp knife and a compass. I then cut slightly smaller rings from foam core.


I then glued the rings to the posterboard.


Then I used green stuff putty to create a nice slope on the bottom portion; the top turned out to be too steep, so I just cut away from the foam core.


After a little bit more putty work, I was happy with my slope. I watered down some PVA glue, painted the whole thing with the adhesive, then added ballast to the template.


There's one of the bog trogs for comparison. There'll be another pass of ballast, then primer.